Kohlrabi is a really versatile veggie, you can eat it raw, roast it, sauté it, steam it, and it's hearty enough to withstand all these different cuts and heats while staying strong, and a bit sweet.
Think of these as a high fiber, vitamin c packed, B-vitamin latke that comes with it's own delicate sweetness and nowhere near the carbs of potato, and is also gluten free and very hearty, thanks to the cornmeal
Plus, using flax to bind it stocks these kohlrabi pancakes with Omega-3s, and skips all the saturated fats of things like eggs and butter.
Swap out a cup or two of kohlrabi with summer squash, grated just the same, for a bit more sweetness or variety, or alternate, and have a fritter buffet.
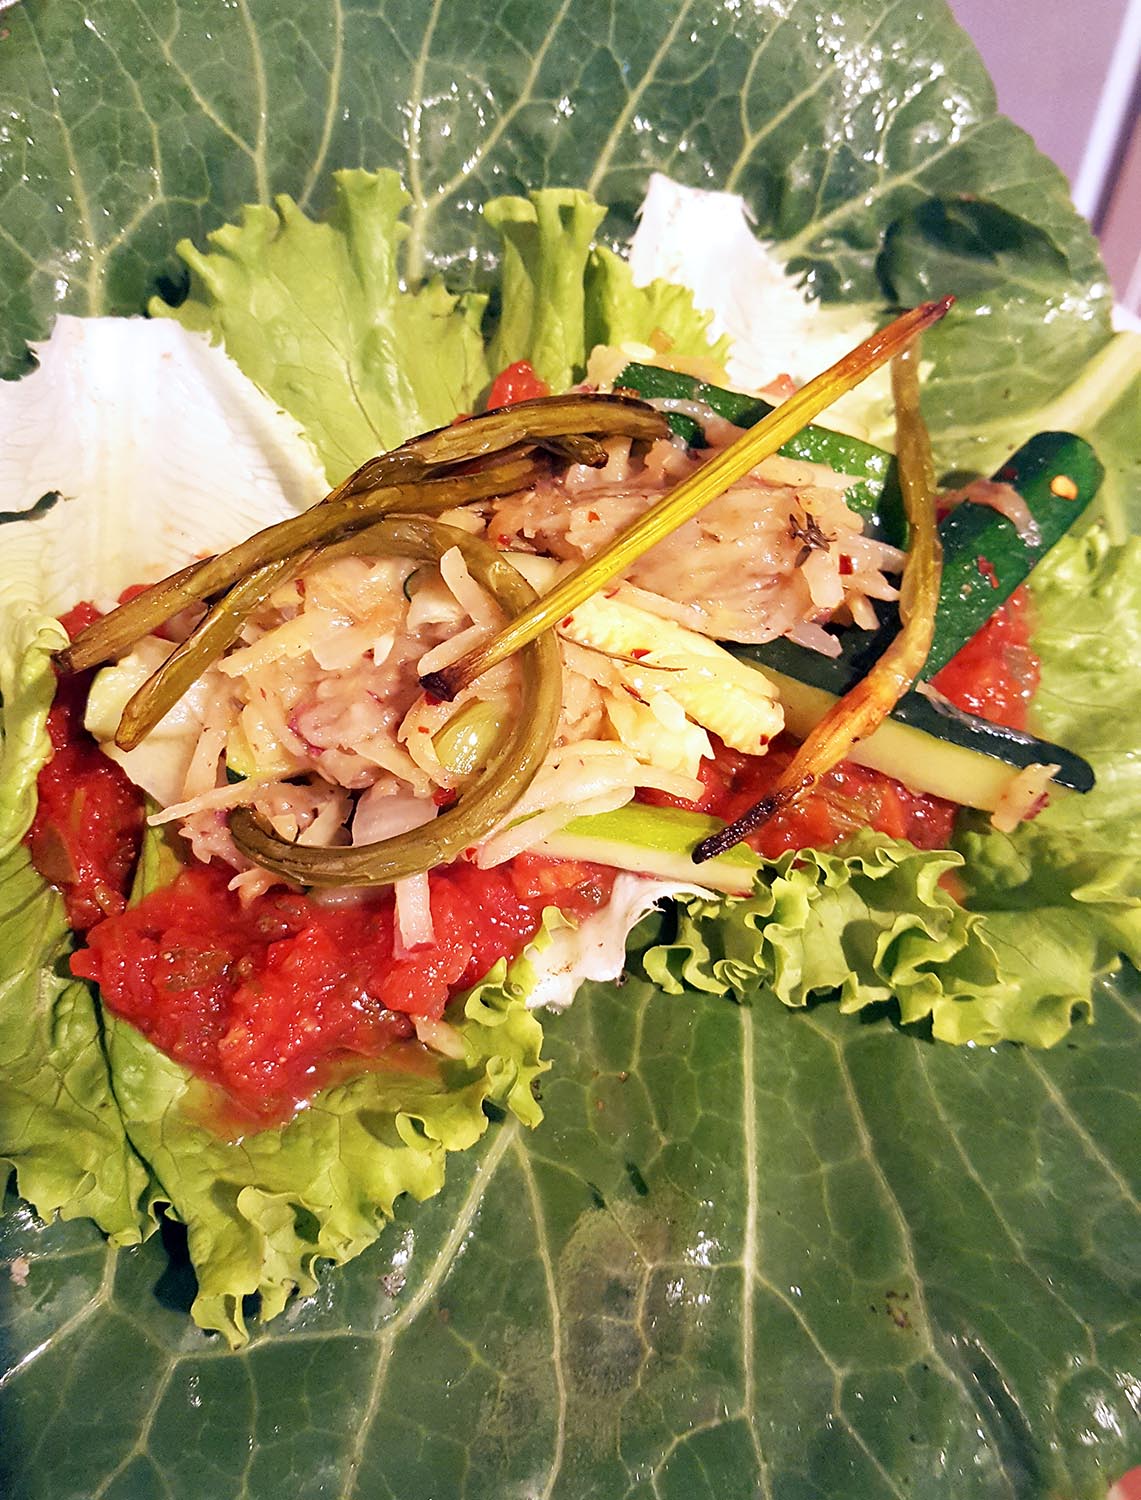
Makes about 12, 3" diameter fritters. I really like them with sriracha added to a little vegan aioli (as pictured) but they also served up well with pumpkin or squash butter.
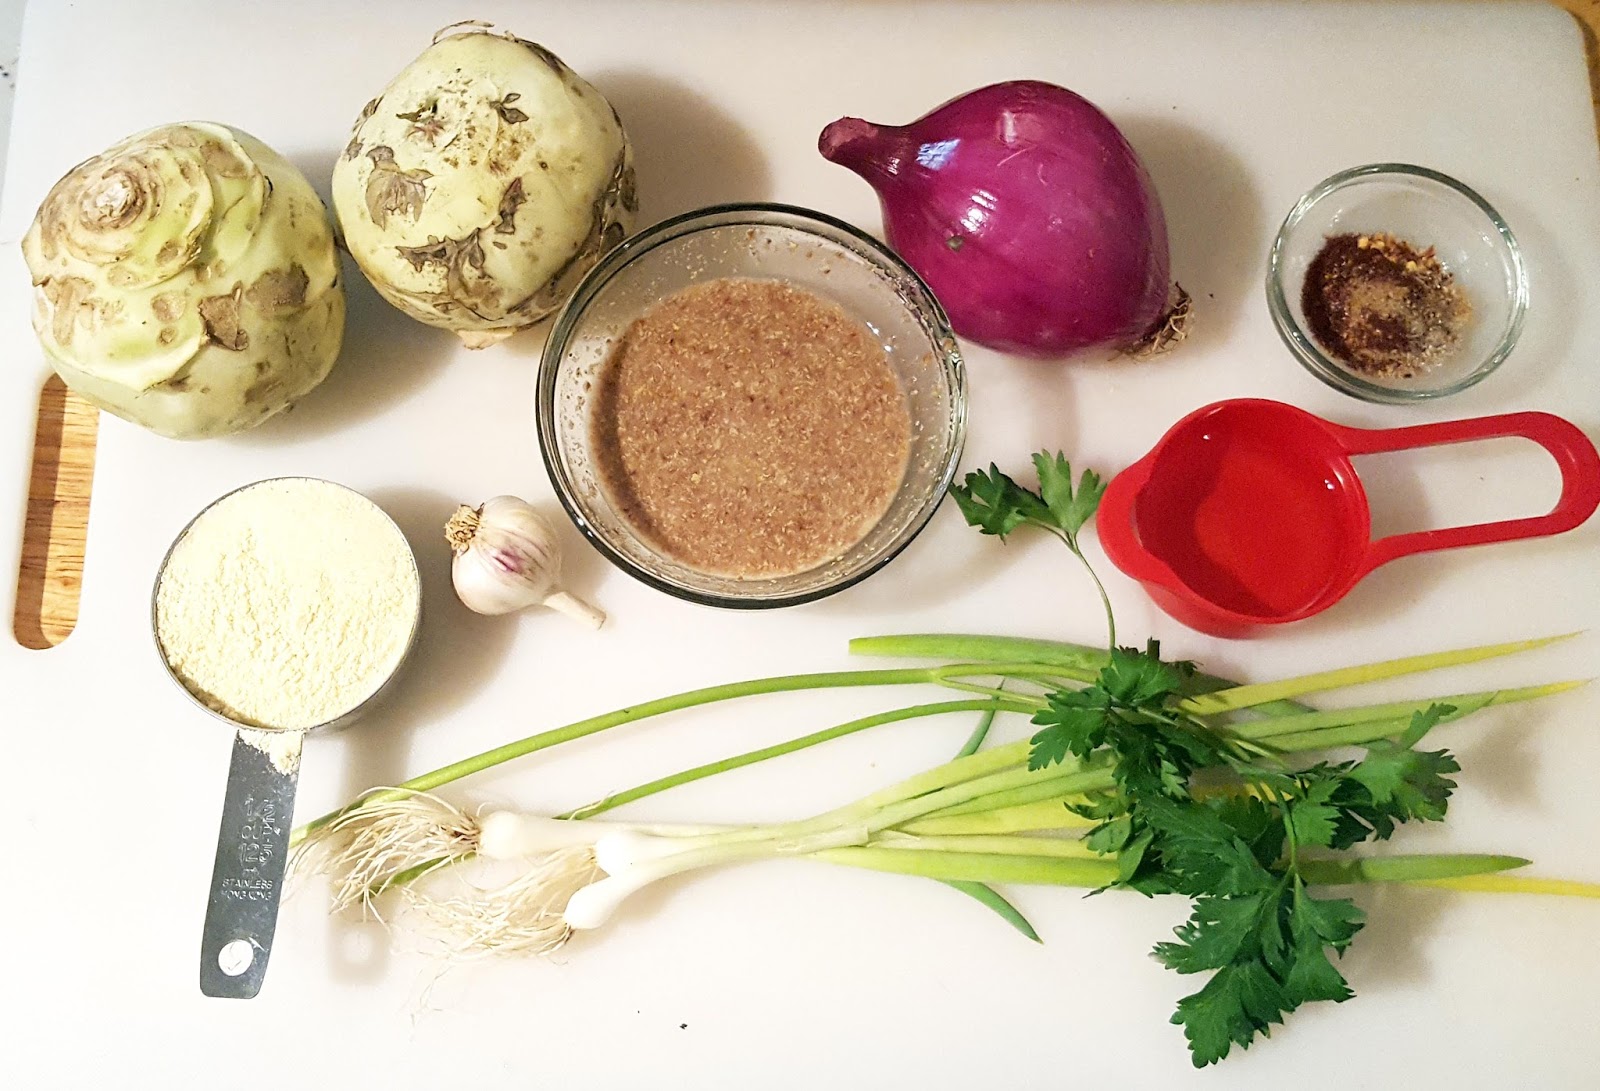

What you'll use from your bag:
2 kohlrabi, peeled and grated
3 Spring onions, finely chopped
1 red onion, grated
What else you'll need:
 2/3 cup Cornmeal
2 Tbs flax, fork whisked with 5 Tbs warm water
1 bulb of garlic, 3/4 minced, and 1/4 crushed and added to oil
1/3 cup oil, and more as you fry
2 tsp Crushed Red Pepper
2 stalks fresh Parsley, chopped
1/2 tsp black pepper
1/2 tsp smoked salt
1/2 tsp sea salt
 1 tsp coriander seed powder
First, shred you kohlrabi and onion
2 kohlrabi will produce approximately 5 cups grated, and the onion another 1+. Wrap them in some paper towels, or a dish cloth and squeeze the liquid out (yes, that ball is the shredded mixture less wet). Don't be so fast to throw out that liquid, thought, it's incredibly tasty and delicious and is an excellent addition to any broth or the base for a marinade.

Next, combine everything except the oil and 1/4 of the garlic
Start heating your skillet, frying pan, or griddle. Mix all of the ingredients together, helping the
mixture firm up and evenly dispersing the parsley, flax, and spices. The mixture should be tacky and maintain it's shape. Form into thin, flattened, palm-sized patties.
 Heat the oil in the pan with the garlic, once the garlic has browned, add your patties to the oil, and cover, flipping 3 times, with about 1-2 minutes in between each, or to desired crispiness (MUCH less
 time is needed if using a cast iron griddle!)

Whip up some more squash-cheese, serve with traditional apple sauce, or try a vegan avocado aioli recipe. My partner said he thought old bay would be an excellent addition to these, and if you are in the mood for crab-cake alternatives give that a try!
Enjoy!