Saturday, July 30, 2016

Cherry Tomato Gazpacho- Raw, Fast, Easy and Delicious


If you are like me, than summers aren't exactly easy.  You need to cram family visits, outdoor activity, work, and recovering from the heat into practically everyday.  So you need something, fast, something cooling, something that'll keep in your fridge and something that you can make with allllll those cherry tomatoes we keep getting in our Karma Farm bags :)

This gazpacho can be ready in under 10 minutes, with a food processor, and only requires the most minimal of pre-chopping.  If you are chopping by hand, I recommend a VERY sharp, very large chef knife to speed through the fine dicing...and you will get a chunkier soup, which is totally fine.

This recipe will produce 2 hearty portions, or 4 lunch time portions, depending on when you need the most humidity recovery intervention.


What you'll use from your bag
2 orange peppers
2 spring onions
~ half your cherry tomatoes
red onion (technically from last week, but you may use store-bought)
1-2 cucumbers (this week's or last's)


What else you'll need
2 spring of fresh parsley
1/4 cup cilantro
1 Tbs fresh dill
1/2 lemon
2 radishes
1 Tbs balsamic vinegar
2 tsp agave nectar
salt and pepper to taste
Optional: 1 tsp crushed red pepper


First, pre-chop the onion, cucumber and peppers
You can leave the tomatoes, whole, but it's best if no other ingredient has pieces larger than your tomatoes, to ensure a more consistent final texture.

Add all your ingredients to the food processor, for me that just about filled my 14 cup.  Feel free to divide your ingredients in half, or add the tomatoes last, as it will compress very fast as it becomes
chopped.

I usually pulse in counts of 5 until the texture is still a little chunky, but looks completely mixed, with no large chunks of any one vegetable or herb.  This usually takes about 1 minute, and I scrape down the processor bowl with a spatula once or twice and add salt and pepper to taste.

Once it is a nice texture, you may chill it and enjoy it for up to 5 days, or eat it straight out of the processor bowl (which is usually what I end up doing!)

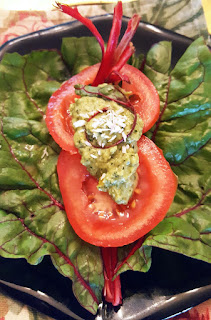
In the picture, my bowl is adorned with raw sprouted watermelon seeds, and if you haven't tried them,  I encourage you too!  The black shell casing is removed, and the sprouted seeds have a wonderful nutty flavor.  You can find pre-sprouted seeds for sale at places like Mom's.

ENJOY!

Classic Half-Sour Pickles

Not sure what to do with a pile of cucumbers of all sizes? Well, especially since Harmony Cucumbers are pickling cukes, I say: We Can Pickle That (part 2)  The thing to keep in mind about pickling varieties, is that they don't keep very long in the fridge, and since they aren't very tasty on their own (but they're fine to cook with)  I'm taking all of mine straight from the bag and into my pickling jar.

This method is a lacto-fermentation method, meaning that it uses the natural bacteria in water and air to pickle the vegetable with the preservative assistance of salt, and uses no vinegar.  A vinegar pickle is a "full-sour" and these get referred to as a half-sour.  Better yet, the fermentation allows for a concentration of pro-biotics, most importantly the lactobacillus bacteria that lends itself to the name lacto-ferment.

I'm using a 2L jar, but you could probably use a 1/3 gallon, or 6 or 7 cup jar with an air-tight lid.  Using this method your pickles will be ready in 5-7 days!


What you'll use from your bag:
All your cucumbers, make sure to wash them thoroughly!


What else you'll need:
1/2 tsp coriander seeds
1/2 tsp caraway seeds
1 tsp black pepper corns
1/2 tsp yellow mustard seed
1 black cardamom pod
1/4 tsp fennel seed
1/4 cup sea salt
small handful of fresh dill
1 bulb of garlic, crushed
6 cups water, filtered


First, crush or grind your spices
You can leave the spices whole, but its much better to invite the liquid to mingle more, so the pickles become more infused.

Add the spices to the bottom of the jar, and then add the crushed garlic, and the fresh dill.

Next, add the salt to create a brine
Add the salt right to the top of the pile at the bottom of your jar, and then cover with the 6 cups of water.  Cover with the lid, and shake until the salt has dissolved completely, the dill should rise to the surface of the liquid.

Note: if you use a smaller jar, drop the liquid to 5 cups.

Next, add your cucumbers
I usually leave them whole, and I haven't tried making sandwich slices, or spears, so I just dump them all in, allowing any excess water to spill into the sink (you want an inch of air or less in between the liquid and your jar lid)  and then I place the jar, sealed, into my fridge.

Check them in 5 days to see if they are pickled enough for you, and if not check them once or twice.  Theoretically, half-sours should keep for about a month, but the above picture are pickles I made at least 5 months ago and are still perfect and tasty (but VERY pickled).  Unlike vinegar pickles, they won't sour up, or have a strong pickle smell, but they should be firm and still a little crisp, like an in-between vinegar pickles and cucumbers in appearance.


Enjoy!


Saturday, July 23, 2016

Kohlrabi Cornmeal Fritters


Kohlrabi is a really versatile veggie, you can eat it raw, roast it, sauté it, steam it, and it's hearty enough to withstand all these different cuts and heats while staying strong, and a bit sweet.

Think of these as a high fiber, vitamin c packed, B-vitamin latke that comes with it's own delicate sweetness and nowhere near the carbs of potato, and is also gluten free and very hearty, thanks to the cornmeal

Plus, using flax to bind it stocks these kohlrabi pancakes with Omega-3s, and skips all the saturated fats of things like eggs and butter.

Swap out a cup or two of kohlrabi with summer squash, grated just the same, for a bit more sweetness or variety, or alternate, and have a fritter buffet.

Makes about 12, 3" diameter fritters.  I really like them with sriracha added to a little vegan aioli (as pictured) but they also served up well with pumpkin or squash butter.


What you'll use from your bag:
2 kohlrabi, peeled and grated
3 Spring onions, finely chopped
1 red onion, grated


What else you'll need:
2/3 cup Cornmeal
2 Tbs flax, fork whisked with 5 Tbs warm water
1 bulb of garlic, 3/4 minced, and 1/4 crushed and added to oil
1/3 cup oil, and more as you fry
2 tsp Crushed Red Pepper
2 stalks fresh Parsley, chopped
1/2 tsp black pepper
1/2 tsp smoked salt
1/2 tsp sea salt
1 tsp coriander seed powder


First, shred you kohlrabi and onion
2 kohlrabi will produce approximately 5 cups grated, and the onion another 1+.  Wrap them in some paper towels, or a dish cloth and squeeze the liquid out (yes, that ball is the shredded mixture less wet).  Don't be so fast to throw out that liquid, thought, it's incredibly tasty and delicious and is an excellent addition to any broth or the base for a marinade.


Next, combine everything except the oil and 1/4 of the garlic
Start heating your skillet, frying pan, or griddle.  Mix all of the ingredients together, helping the

mixture firm up and evenly dispersing the parsley, flax, and spices.  The mixture should be tacky and maintain it's shape. Form into thin, flattened, palm-sized patties.

Heat the oil in the pan with the garlic, once the garlic has browned, add your patties to the oil, and cover, flipping 3 times, with about 1-2 minutes in between each, or to desired crispiness (MUCH less
time is needed if using a cast iron griddle!)

Whip up some more squash-cheese, serve with traditional apple sauce, or try a vegan avocado aioli recipe.  My partner said he thought old bay would be an excellent addition to these, and if you are in the mood for crab-cake alternatives give that a try!

Enjoy!


Saturday, July 16, 2016

Garlic Scape and Sweet Pepper Pesto


The last of the garlic scapes has arrived.  Whether you are sick of them or looking to make them last, this pesto is going to really be a game-changer for you, and you'll find yourself adding it to everything.  This year, my partner and I discovered the joys of basil and pepper pesto on pizza, and it spawned an endless game of putting pesto on everything imaginable.

Also, word on the Karma Farm Streets is that if you go to visit the farm they'll send you out with an armful of fresh herbs, like basil, which is bountiful right now.  So reach out, and schedule your visit this weekend and make this delicious pesto your new obsession :)

Roasting is the best treatment for these sweet peppers, as the low heat short roast will soften them, allowing some earthy flavors to mix and drawing out the sweetness, while retaining some of the snap from the moisture.


What you'll use from you bag:
1 sweet carmen pepper
5 garlic scapes
2 bulbs of garlic (technically from last week's bag)

What else you'll need:
1 cup tightly packed basil, (you can get this from the farm!)
1/2 cup pine nuts, 1/4 cup raw and 1/4 cup roasted
1/2 cup avocado oil
1/4 cup nutritional yeast
3/4 tsp salt
1/2 lemon peel, sitting in the oil
1/4 cup spring onions

1 sprig fresh thyme 


First, you'll preheat the oven to 350 degrees

Cut the pepper into large pieces, just enough to get the seeds out, and to coat the inside and outside with some oil.  I just dunk them right into the bowl with oil, and brush off the excess.  Do the same with the garlic scapes, but keep them whole.

Onto a baking sheet lined with tin foil, add the oil covered peppers and scapes, 1/4 cup of pine nuts, and 2 entire bulbs of garlic with their end chopped off, skin still on.

Roast for 12 minutes, turning once.


Now, slice the lemon peel and add it to the oil
This will allow the oil to take on a slightly citrus quality, and soften up the lemon peel making it easier to incorporate in the food processor.

Add all your remaining ingredients to the food processor, and wait to add the lemon+oil until just before the roasted veggies come out.


Let the roasted veggies cool
Once you can comfortably hold them in your hand, transfer them to the food processor, but make sure to squeeze out the garlic from its skin, it should slide right out if you hold the pointed end.

The longer you process, the smoother and creamier the texture, so if you prefer a more oily looking, chunky pesto, don't process very long, but pulse until desired texture is achieved.  I like the creamy texture, and it fools even the most epicurean of omnivore foodies :)

Put this on just about anything. This is a soft, layered flavor, that has a bit of sweet, and a lemon (not sour) but a distinctly lemon flavor.  We put it on our breakfast scramble tacos this morning :)

Enjoy!


Monday, July 11, 2016

Calabacita Collard Green Wrap with Roasted Garlic Scapes

A collard wrap is an essential tool in the healthy cook's toolkit, but they can get a bit, well, redundant. Hummus here, alfalfa sprouts there...and usually raw or cold.  Hopefully for everyone here, this warm, savory, and bountiful wrap will be a pleasant diversion.  I was inspired by the intense and increasing quantity of some of these items in my fridge *ahem garlic scapes ahem* and was mightily tempted to simply eat the filling by itself-- it was THAT good.

The struggle is real, you could probably do both, eat the filling and make a bunch of wraps, depending on how many meals on the go you need for this hot summer week.

I was able to make 6 large wraps out of these, but probably 8 is a safer estimate, and largely depends on the number and size of your collards.


What you'll use from your bag:
10+ Collard Leaves, soaking in warm vinegar water or blanched
1 summer squash, cut into sticks
4 potatoes shredded (2 cups)
10 garlic scapes, cut into 4" pieces (ok this is leftover from last week, but you still have some right? I roasted all that I had left, and plan to make a garlic scape pesto, anyone want that recipe?)
1 Sweet onion, coarsely chopped

2-3 leaves of lettuce per wrap

What else you'll need:
3 Tbs Adobo spice
Your hot sauce of choice, to taste
Fresh thyme, one sprig
1 Tbs mustard seeds, whole
Salsa fresca
Salt and pepper to taste
Oil for sauté and roast

First, preheat the oven to 400 degrees
Prepare the garlic scapes to be roasted, tossed in about 1/2 Tbs of oil with a little salt. Then roast for about 12-14 minutes, stirring every 5 minutes.

Set your collards to soak in warm water, covering all the leaves you plan to use, including 1/4 cup apple cider vinegar to break down the cell wall...or Blanche for 2minutes and submerge in cold/ice water after if you prefer heat-cooked greens.

Next, heat your oil in a large skillet
You want to make sure it's nice and hot, because in will go your mustard seeds and 2 cups shredded potato first thing. Stir to ensure even oil absorption, and cook for 8 minutes until it starts to brown and get tacky.

Add your squash, stir thoroughly, and then cover. Cook for 3 minutes, so the squash can get a little tender and brown in some spots.  Add the adobo spice and stir to get some even browning and tenderizing of the squash (2 minutes)


Now, add your onions
The delicate sweet onions get tender fast, and have such a delicious flavor, your don't want to over-zap them.  Give them just 2 minutes in the mix.  Cook until the potatoes look-and-or-taste amazing.  Then remove from the heat and add the fresh thyme.


And now, let's master the collard green wrap
The soaked or blanched leaves will be more supple, and you shave down the thick stem to make it more flat, and pliable for better shaped wraps (and less rip-able!)


Overlap the collard leaves, top side up, with the stems faced away from each other.

Alternate the lettuce leaves along the length of the collards, then add the salsa, the sauté mixture and the garlic scapes to the very center. Try to hold back your hunger and not over fill it.


Fold the stem sides gently in first, leaving the middle filling still exposed, but allowing the side edges of both, and then roll from one direction to the other, pulling the filling towards your hands to keep the roll tight and keep the filling from spilling out as you flip it around.

And don't worry if your wraps have holes in them, because that sticky hash brown sauté will stay put!
Enjoy!


Saturday, July 9, 2016

Pan Seared Green Beans with Garlic Scape and Chickpea Aioli


As I unpacked this week's bag and discovered the green beans,  I exclaimed "ooh, I love green beans, they'll go perfectly with all these garlic scapes!"  A simple side like green beans can really be made a number of ways, but I find the creamy aioli and the pan searing to add a dimension that not only pleases the mouth, but also has a nice thick aroma that really stirs up the appetite.  Your entire house will smell warm and savory, and you can use this garlicky fat as a cooking medium, or even as a salad dressing.

What you'll use from your bag:
4 garlic scapes
All of your green beans

What else you'll need:
1 cup chickpeas
1/2 lemon
2 Tbs coconut oil
2/3 cup broth
1/2 tsp salt
2 tsp fresh dill, or 3 of dried


First, make the aioli
Combine all of your ingredients EXCEPT the green beans into a food processor.  Process until

smooth and creamy, scraping down the sides and assisting the coconut oil t go from solid to liquid. (3-5 minutes) If absolutely necessary, you can add an extra 1/3 cup of broth, or another Tbs of oil, but you'd be better off adding an olive oil if you're having trouble getting your to cream.

While your aioli is processing, prep the beans
It's tedious, but rip or cut the ends off of the stem side of the bean


Now, take your aioli and season the pan
About 1/3 cup into a heated pan will season it and provide just enough fat and steam to sear the beans. 


Add beans and sear on medium, covered, for about 15 minutes, stirring once or twice, until it starts to get dark spots the size you want (everyone has different taste tolerances for that charred taste).

Then add half of the remaining aioli and stir for 3 minutes, take off heat, add remaining to the pan, or reserve for another day, or serve with a cool dollop on top for a second temperature.


Monday, July 4, 2016

Provencal Tian: Broccoli-Cheeze Casserole

Oh Tian, you fancy french name for a cheezie milkee casserole.  Sometimes, the most comforting thing is a deep, warm, melty pot of everything baked together, amiright? For this casserole, I combine the inaugural crop of broccoli from Karma Farms with sliced cremini mushrooms, but other vegetables such as zucchini, eggplant, bell peppers, and even potatoes are traditional and very tasty here, so if you have a giant casserole dish go ahead and add them.

Did you save your Cheeze Sauce from the last post?  I hope so.  If you haven't made it yet and think these flavors won't combine well, I assure you, Herbs de Provence bake up 10x the aromatic power of anything in that cheese, but if you want to skip the liquid aminos or the smoked paprika, for a more subtle classically french cream flavor, I won't judge you ;) Additionally, you can substitute 2 cups of tofutti cream cheese or 2 cups of shredded Daiya in a pinch, but I think the squash cheese is the perfect blend for this dish and cooks perfectly.

Serves 8, serve hot, or cover with foil and reheat in the oven later.

What you'll use from your bag:
2 small heads of broccoli, chopped, with the leaves separated but also chopped
2 garlic scapes, chopped
1 Sweet Onion, chopped

What else you'll need:
2 cups of Cheeze Sauce or other vegan cheese
1 package mushrooms, 8oz, sliced
2 cups Non-dairy milk (I used part soy and part almond, but anything is fine here)
4 Tbs of flax meal, whisked with 1/2 cup warm water
2 cups cooked Quinoa, or a mix of wild rice and quinoa
2 cups of Panko (gluten free, vegan breadcrumbs)
1 Tbs oil to sauté
1 Tbs Herbs de Provence
1 Tbs Blackstrap molasses
Salt and pepper to taste
Optional: sprinkle with Harissa and fresh basil after cooking


First, preheat the oven to 350 degrees, and cook your Quinoa/rice
Boil your water with the grains inside, and the lid off. Should take about 20 minutes.  While that is happening, start another pot of water to boil, to blanche your broccoli.

Chop your broccoli, keeping the leaves to the side. The leaves will be added to your sauté near the end.  Slice your mushrooms, chop your onions, and garlic scapes.  

Add the broccoli to the boiling water for 2 minutes, to blanche. Then transfer to an icebath.

Then, set up your sautee
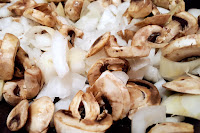
Heat up the oil in a large sauté pan, and add your mushrooms, onion, and garlic scapes.  Cook for 3-4 minutes, covering if you want really soft veggies (remember these will also bake for 30 minutes).

Next add your flax mixture, and stir to coat. It will look sticky, which is exactly what you want.  Then add the "milk," salt and pepper, and herbs de provence, and cook for 5-6 minutes until the sauce thickens, and the flax meal gets even more sticky looking.

Now, add your broccoli and grains
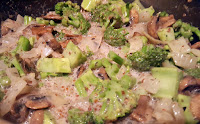
Mix these elements in and you are almost ready.  Once they are fully integrated, add your molasses, cheeze sauce and your broccoli leaves, and cook for 1-2 minutes while stirring.  Then take off the heat.

Then, transfer to a baking dish
This tested the limits of my 2.5 quart casserole dish, if you have a 3 quart, that might be ideal, or you can split this between two dishes (especially if you are adding other ingredients!!)

Line the bottom of the dish with 1 cup bread crumbs, and fill with mixture, and cover with the other half of the bread crumbs.  Put your dish on a baking sheet-- seriously, you'll thank me when you don't have to clean your oven tomorrow.

Bake for 25-30 minutes, turning once (NOT STIRRING!)
Let stand for at least 10-15 minutes after taking it out of the oven, which is hard, because it smells incredible...otherwise your casserole won't set, and will be very runny (BUT still tasty, so priorities)


The harissa and purple basil on the top add some heat, but also bring in a feel for the south of Provence, without muting the lavendar, rosemary and oregano we expect from a french bake.
It stores well, and is mighty filling!

Enjoy!